There are so many process to create a bootable USB Disk . But here we discuss about the easiest process to create a Windows 11 bootable USB Disk . You can do it by following the below step.
- To create a bootable usb you need a 8Gb Usb stick or Pen drive.
- Download the Windows 11 Iso file from Microsoft Official site. To download click here. To know details about How to download Windows 11 iso image step by step you can read our blog here.
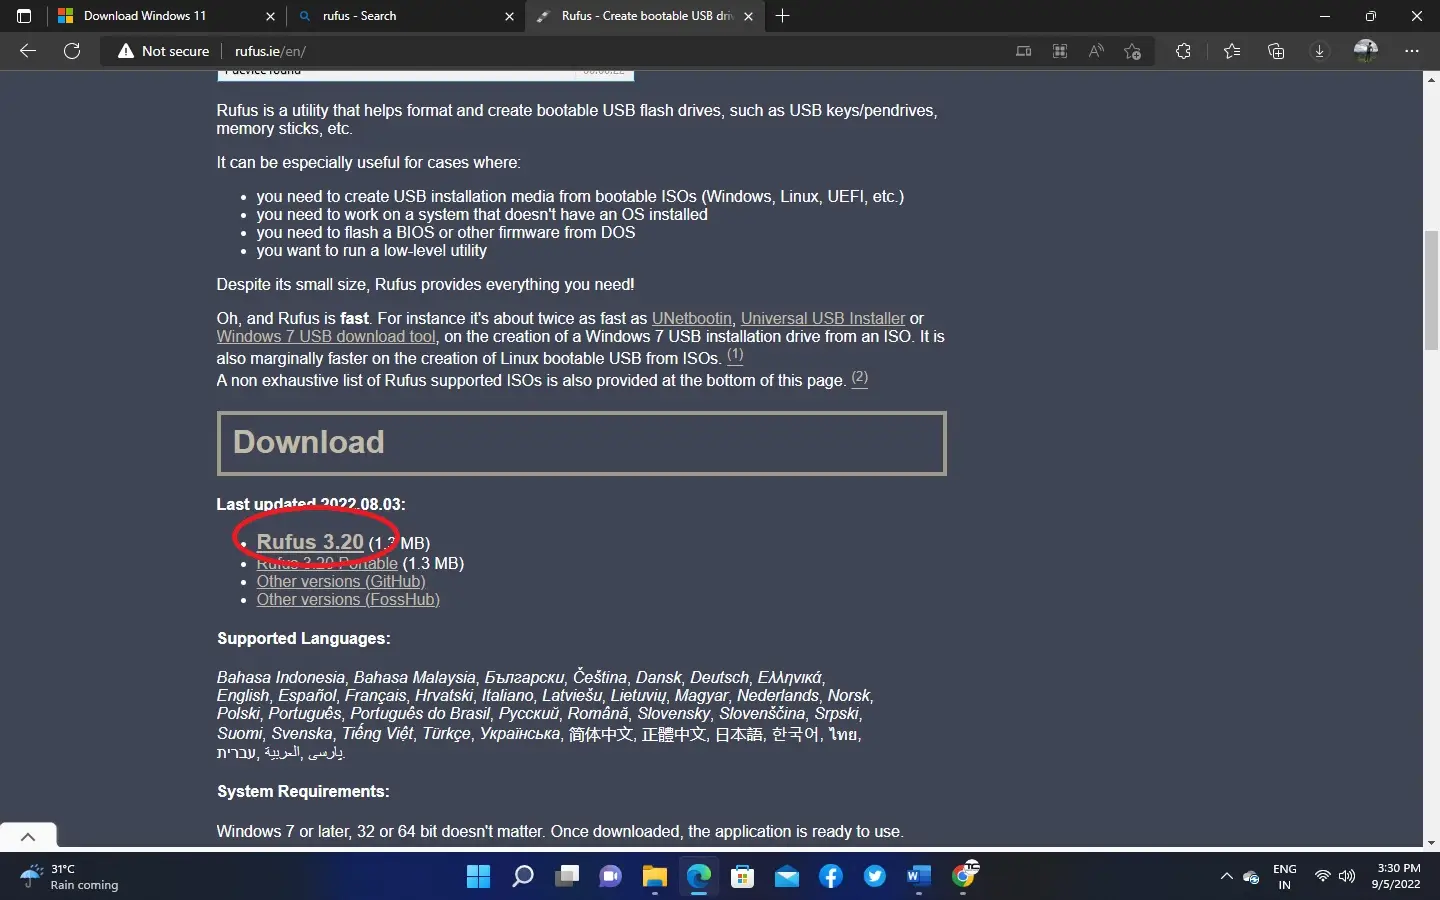
- Download Rufus software. Click here
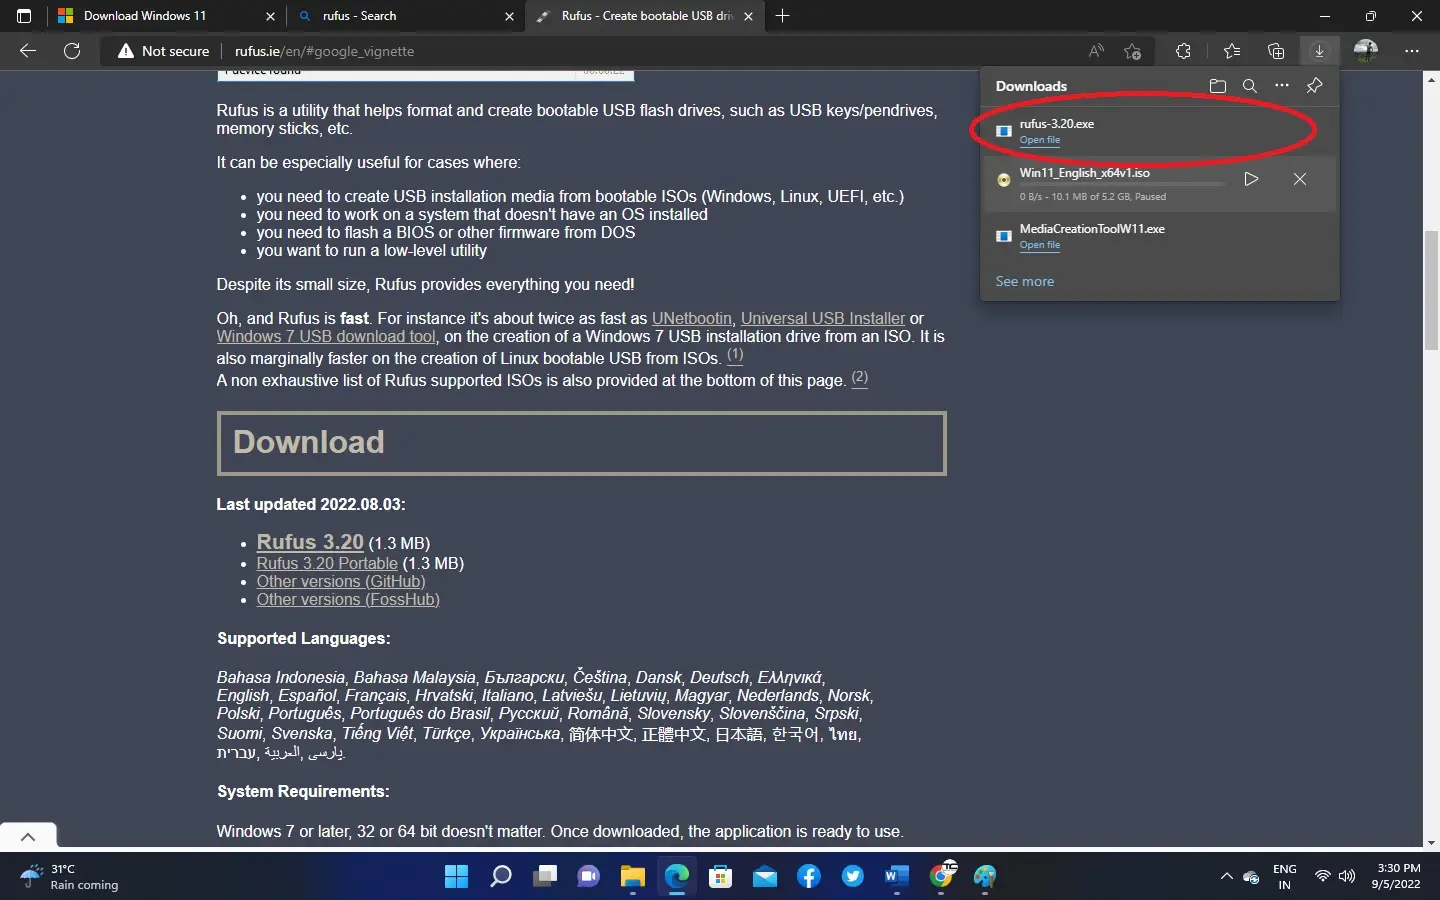
4. Make sure download is completed.
5. Find the Rufus installer from your download location and Open it.
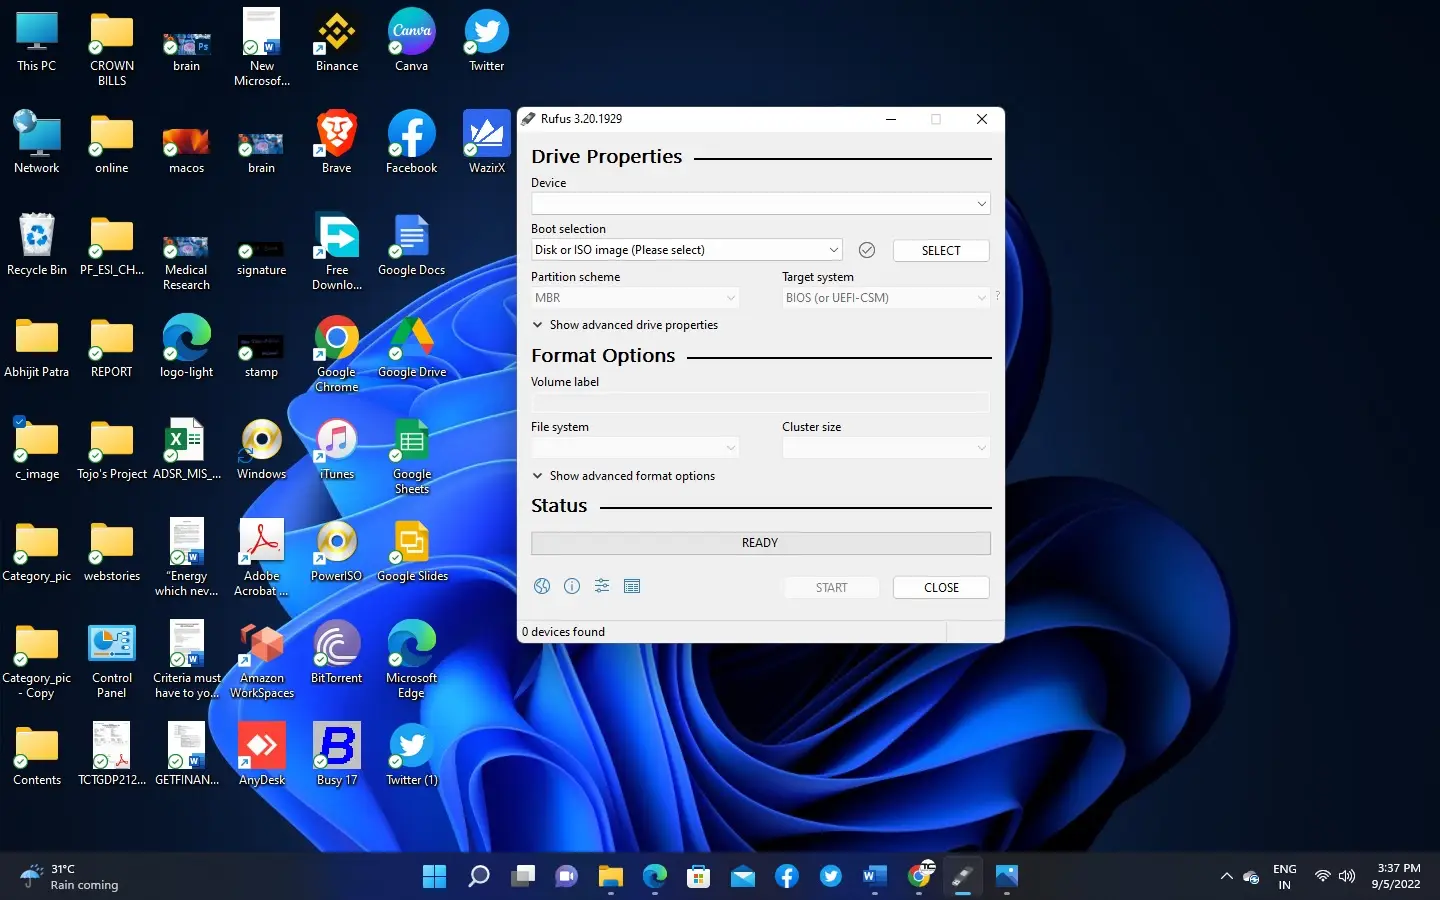
6. Click on “Yes”.
(After click on yes you can see the windows as below)
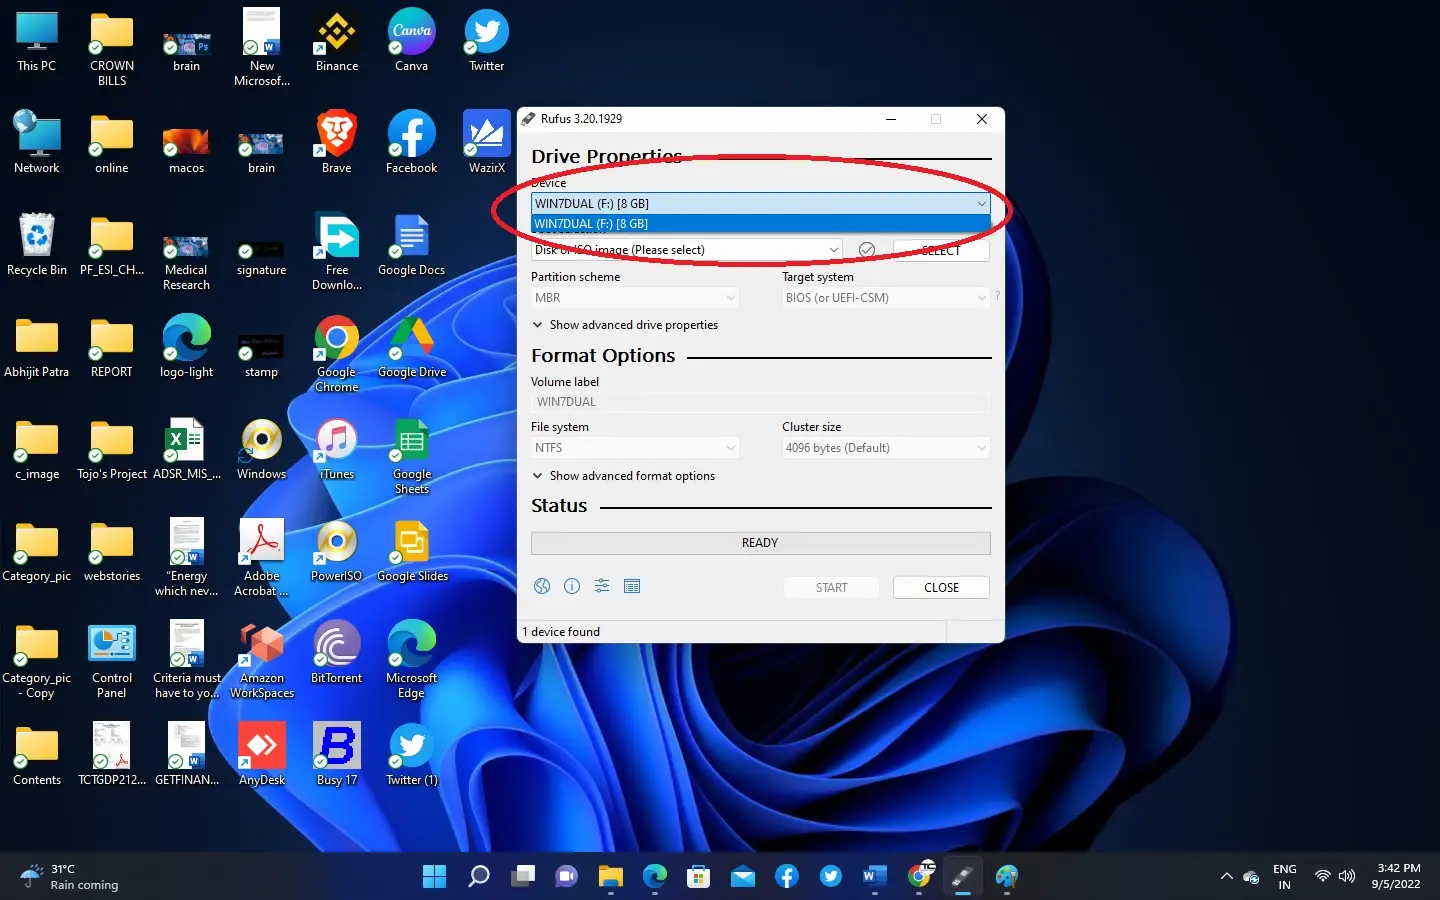
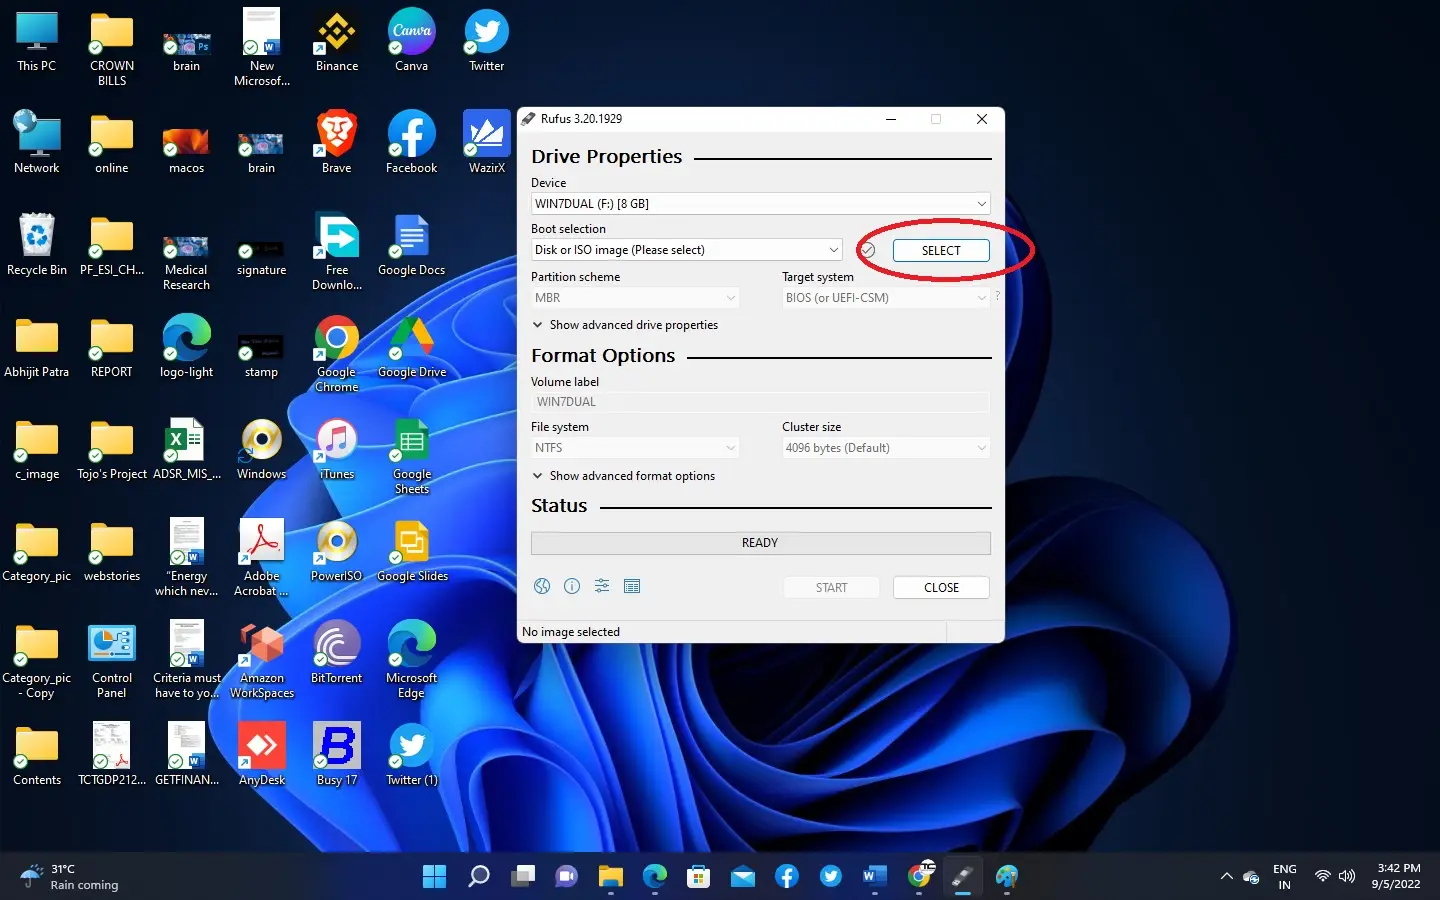
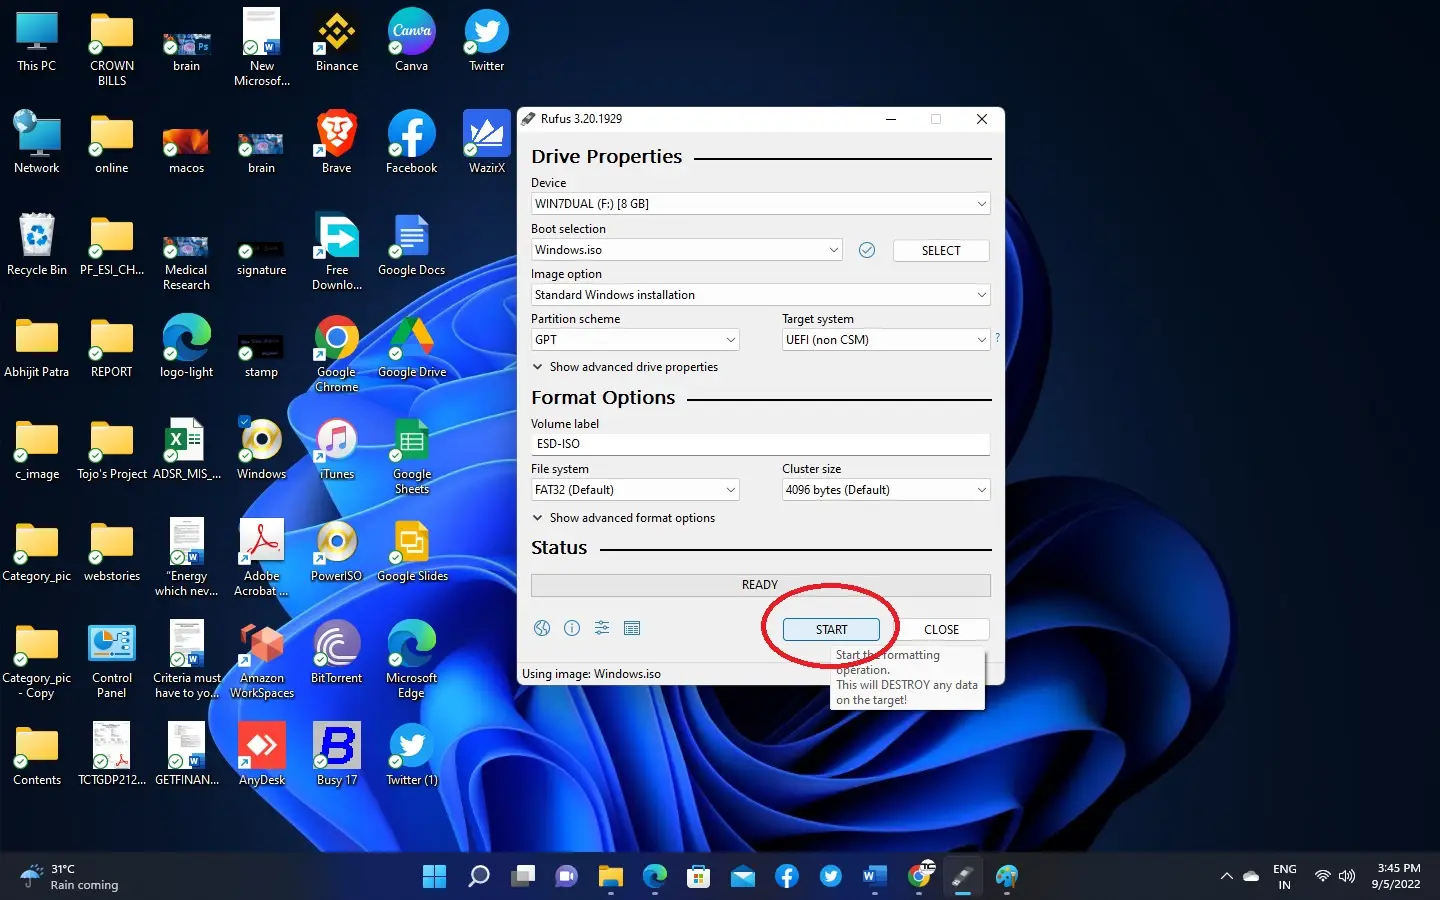
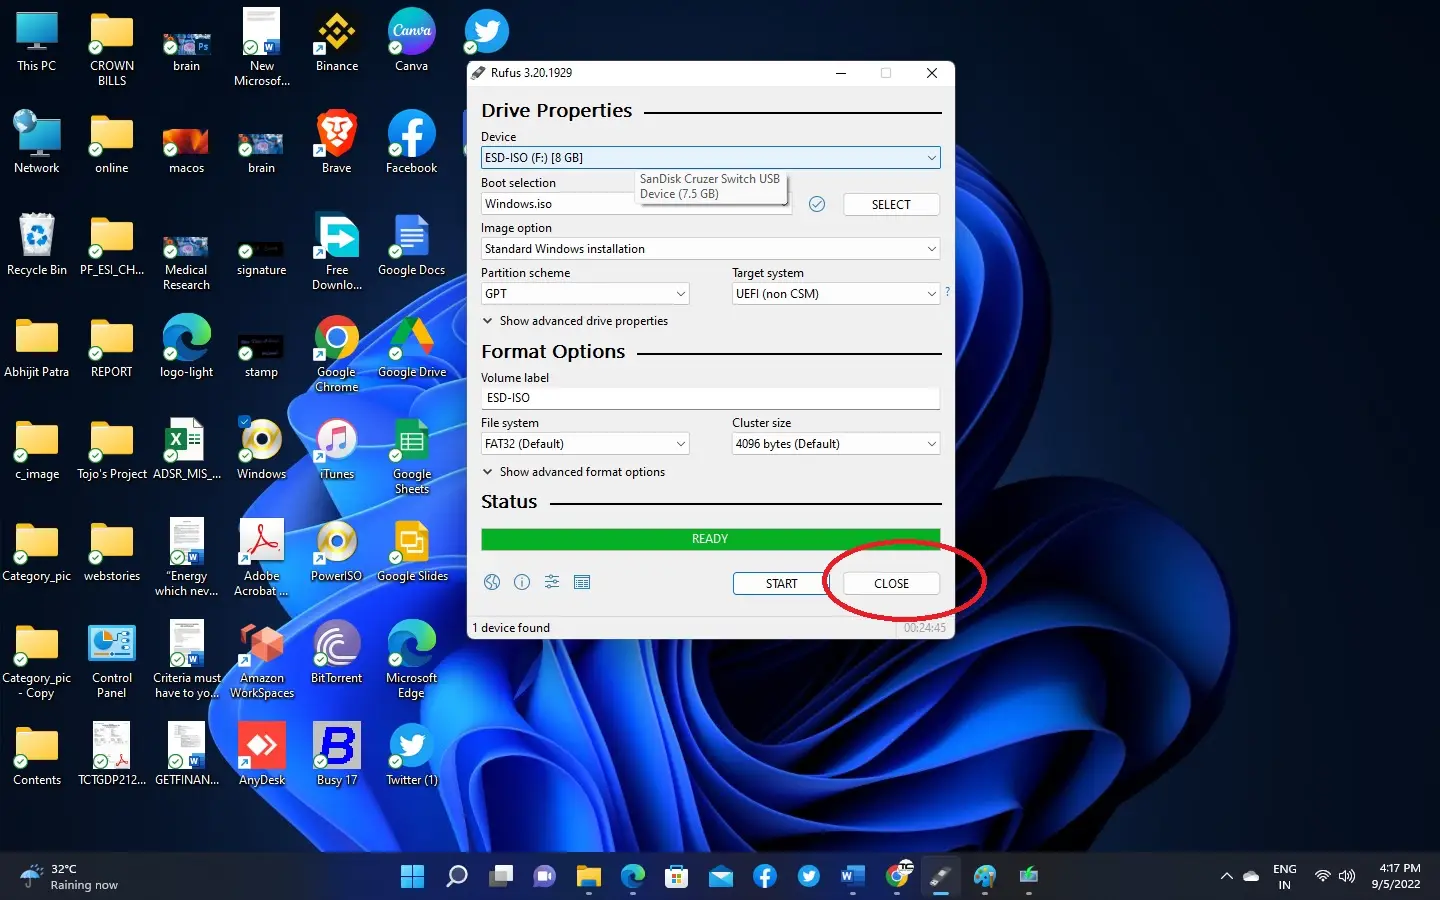
7. Plug-In a 8GB Pen drive to your computer and select it in Rufus software Device drop down list.
8. Make sure that you have downloaded the Windows Iso file previously. Then to select the ISO image click on SELECT button as below
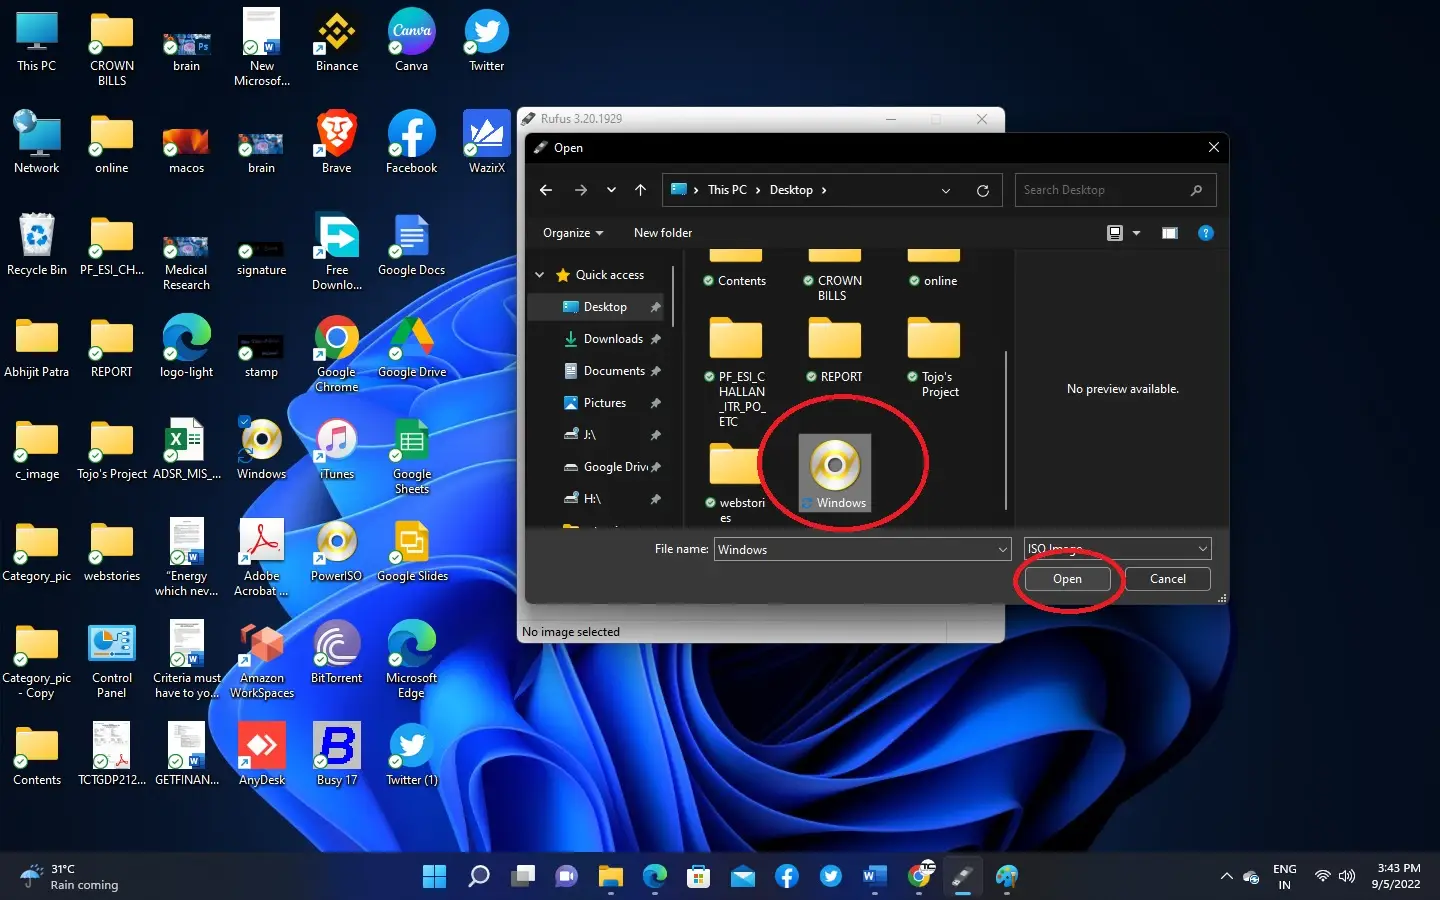
9. Select the ISO image and click on Open .
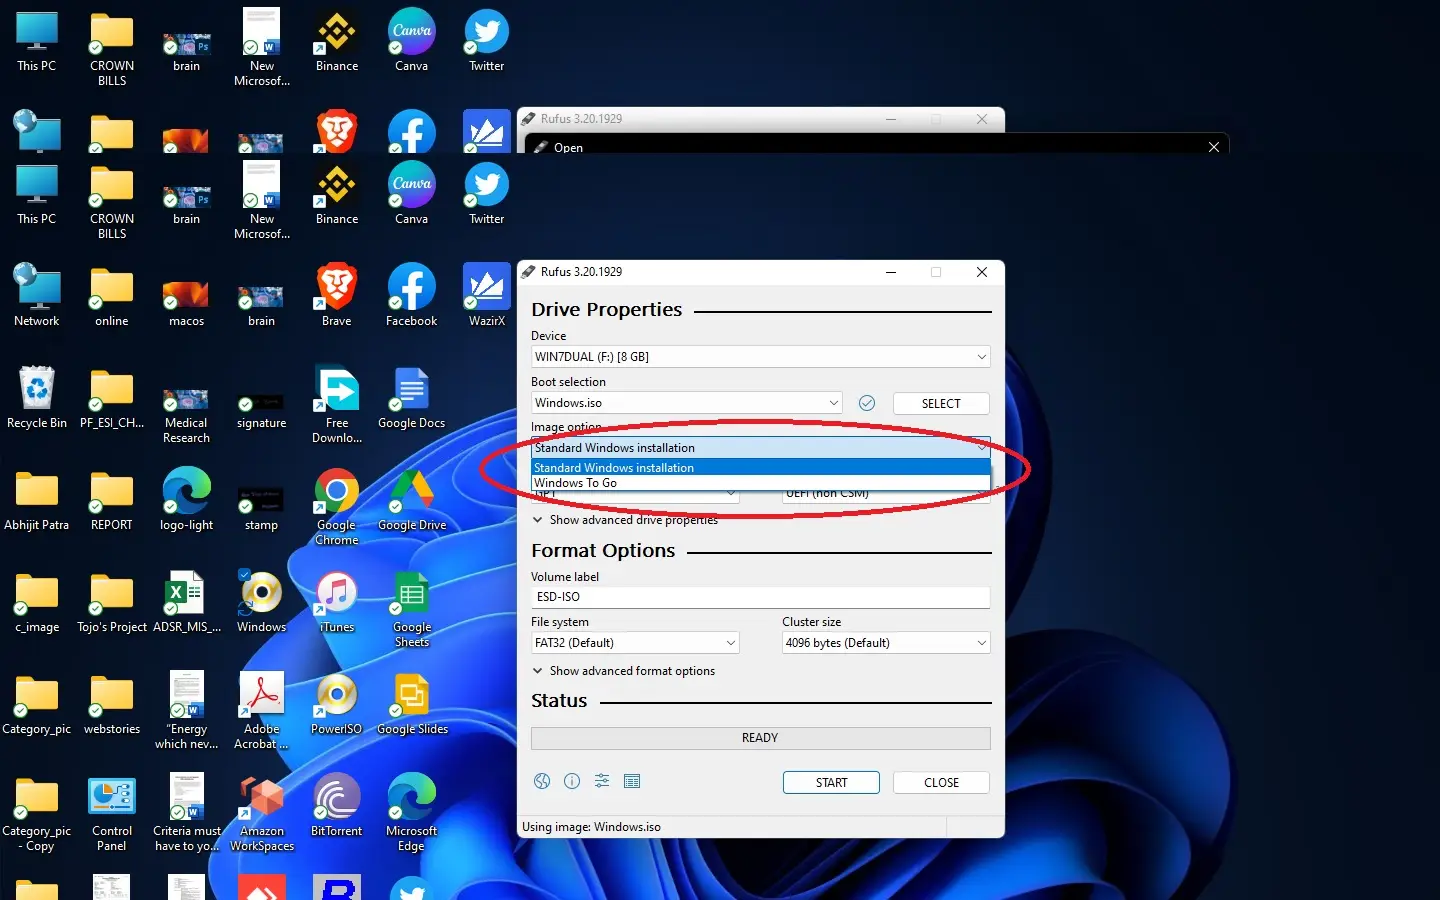
10. On next dropdown list select “Standard Windows Installation”.
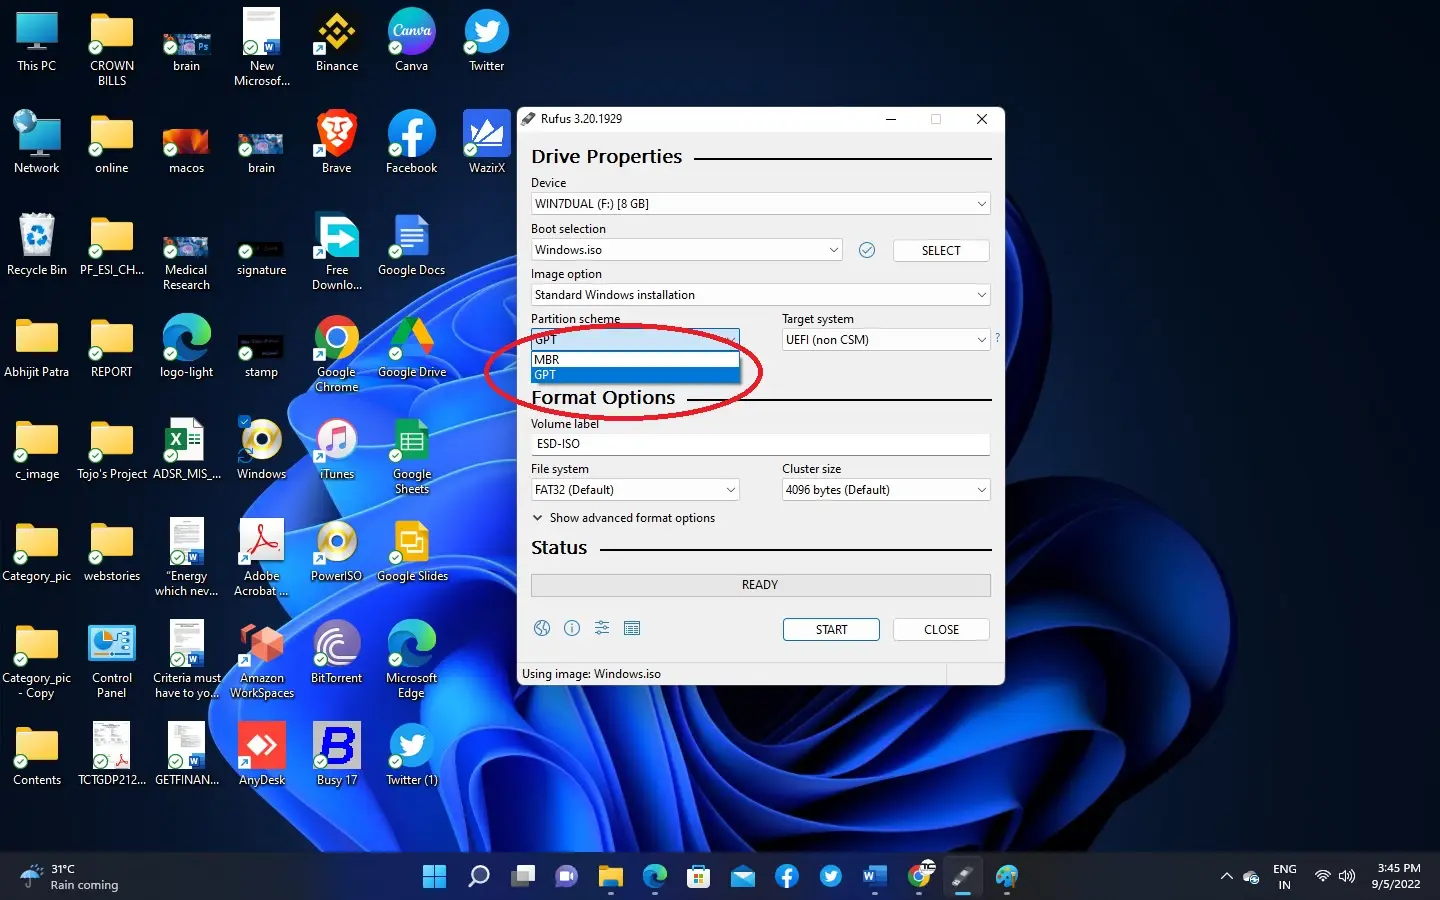
11. Click on next drop down list and select “GPT” option.
12. Click on “START” button
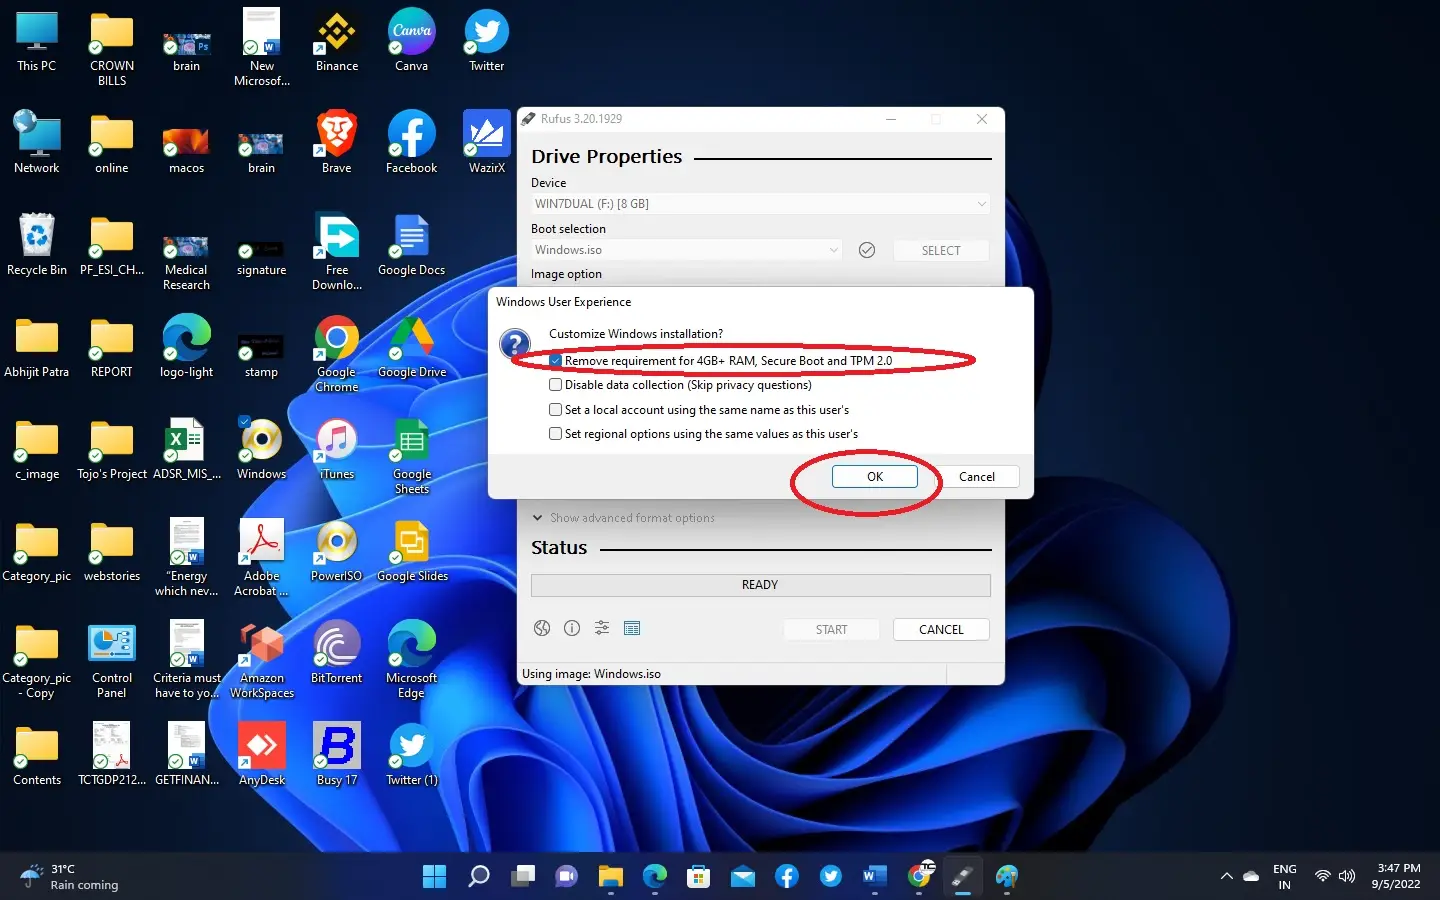
13. After click on start button a pop-up window is appear as below. If you have old generation PC you must click the check box “Remove requirement for 4gb+ RAM Secure Boot and TPM 2.0″
14. Click on OK.
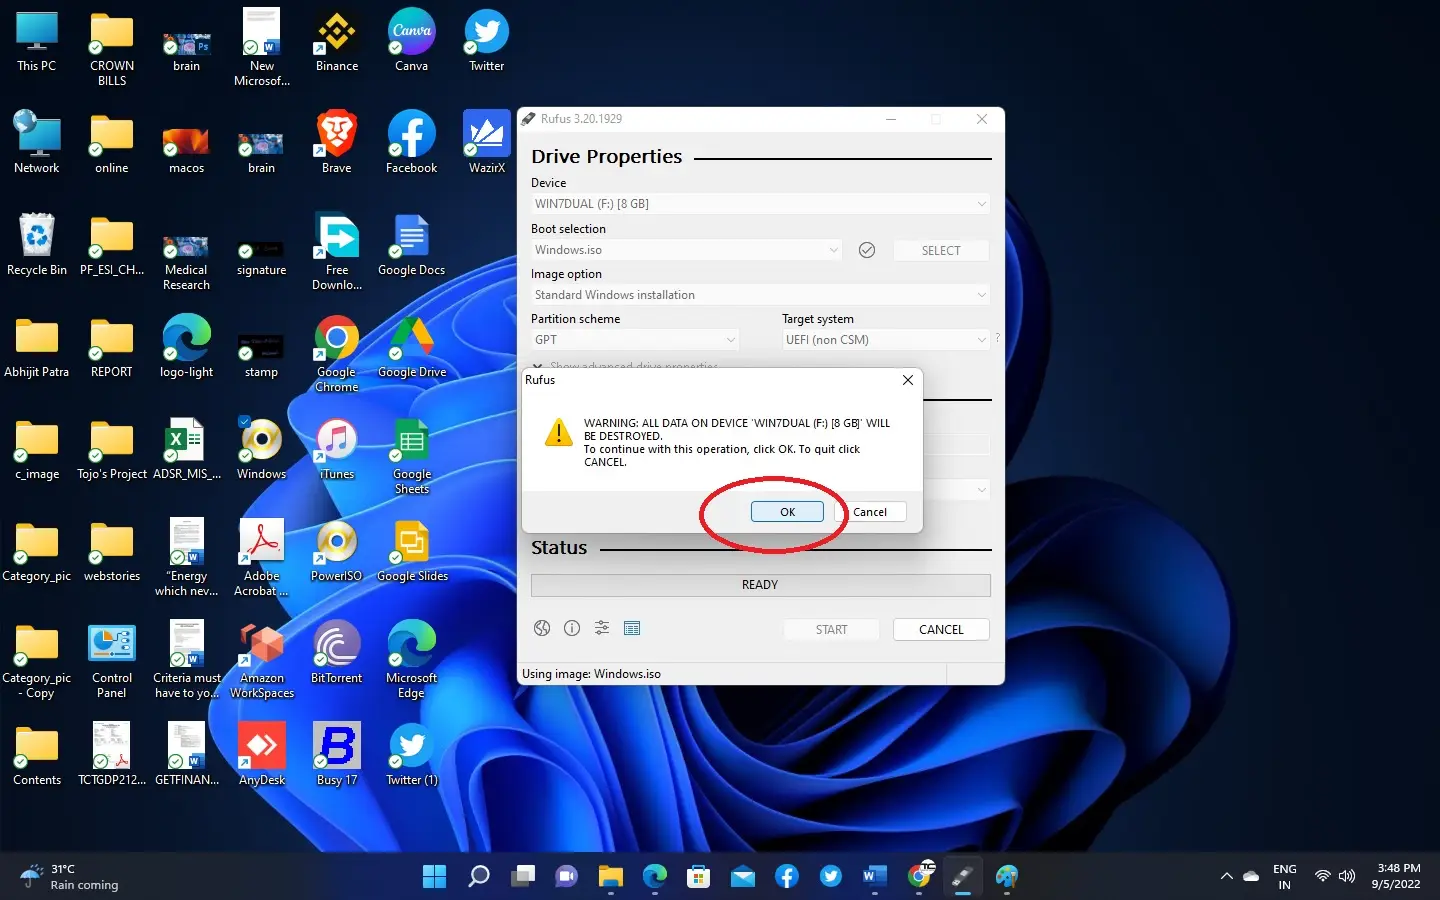
15. Make sure you don’t have any important data on pen drive then click on OK .
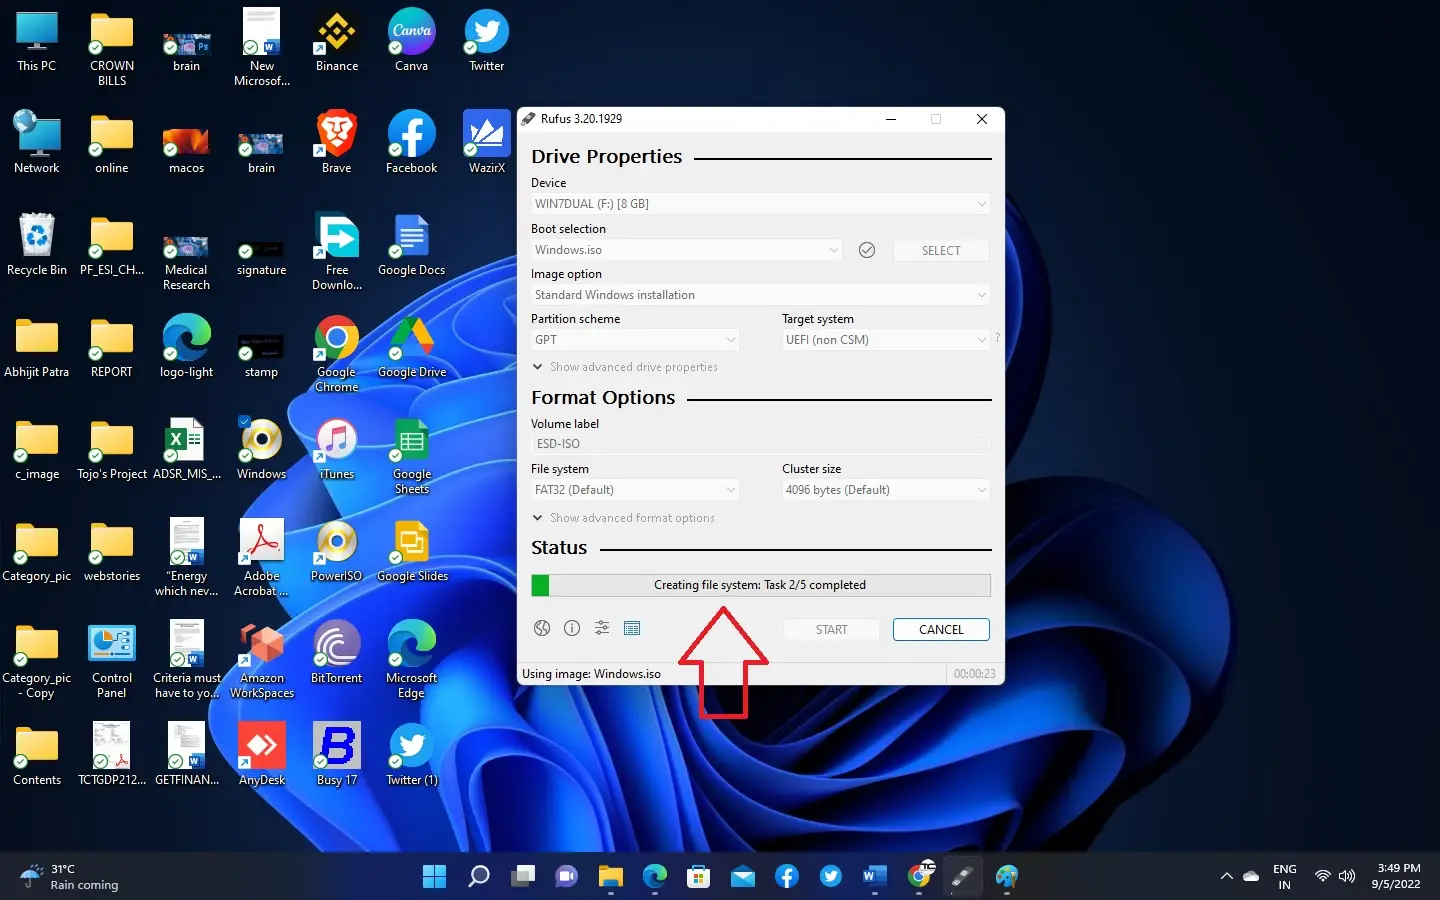
16. Wait for sometimes it may takes 20-30 minutes depends on your Pen drive speed.
17. When its done simply click on “CLOSE” button.
Finally You did it . To know how to install windows 11 on your computer step by step you can read our blog here.
How to install Windows 11 from Usb ?
